You’ve grown a healthy crop of garlic, and now it’s time to reap the rewards. This step-by-step guide for how to harvest garlic includes expert advice and tips, from identifying the right harvesting time to the best curing and storage practices.
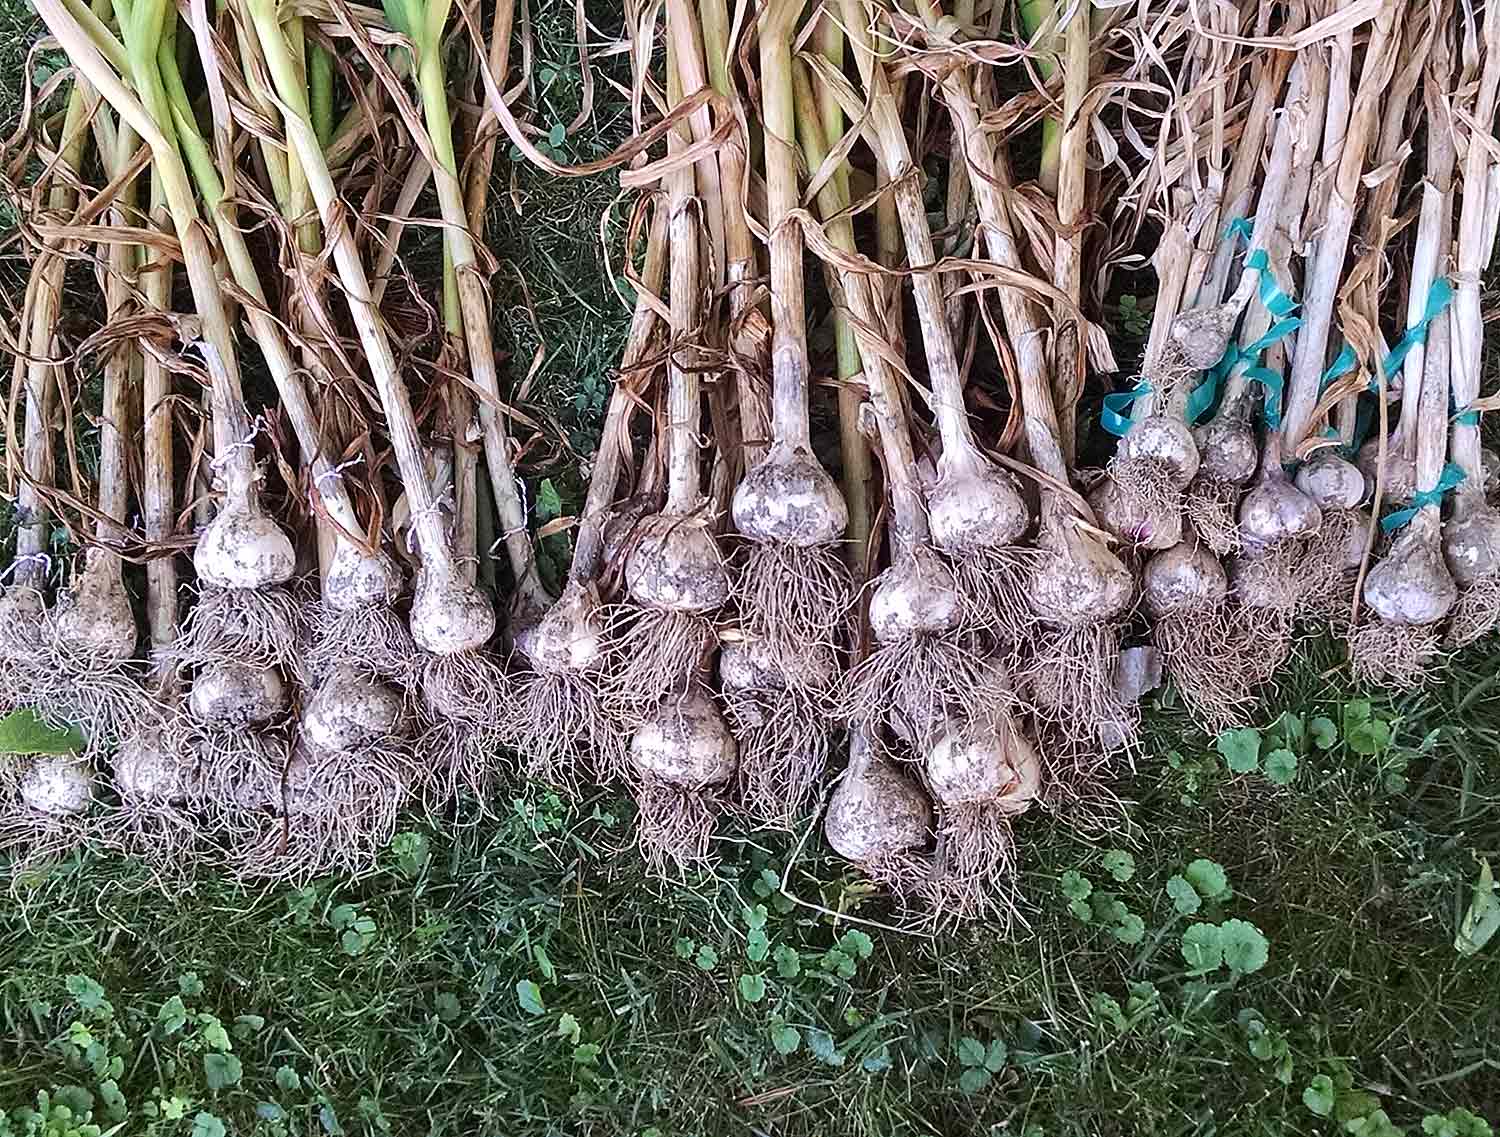
Garlic (Allium sativum) is a popular and essential kitchen staple, valued for its versatility in various recipes, from soup to chili to salad dressings and more. Growing garlic in your vegetable garden not only creates a fresh supply of this wonderful aromatic ingredient but is also an easy crop to manage. And its early spring sprouting schedule always gets the growing season off to a happy start.
When harvested and cured properly, garlic can be stored for a long time, so you’ll have a bounty of bulbs for all of your winter cooking (hello, soup!).
Garlic is actually one of my very favorite crops to grow — second only to tomatoes — and I’ve grown garlic in my gardens for over 15 years. It’s one of the least fussy plants to maintain and is practically hands-off. But at harvest time, a little extra care will extend the life of your garlic bulbs by months.
I’m happy to share my best tips and advice for growing garlic so that you, too, can enjoy this amazing crop!
When is Garlic Ready to Harvest?
So, your garlic bed is filled with tall plants with green leaves, and you can’t wait to see the bulb that’s been incubating underground for months. How do you know when garlic is ready to harvest?
It’s part art, part science, part instinct, but garlic plants are generally ready to harvest when their long leaves begin to yellow, and brown at the tips. A good rule of thumb is to wait until the plant is yellow or brown about one-third to one-half down its height.
Don’t wait until the entire plant is browned and falling over. Garlic bulbs are sensitive to plant decay, and should be harvested while the plant is still healthy.
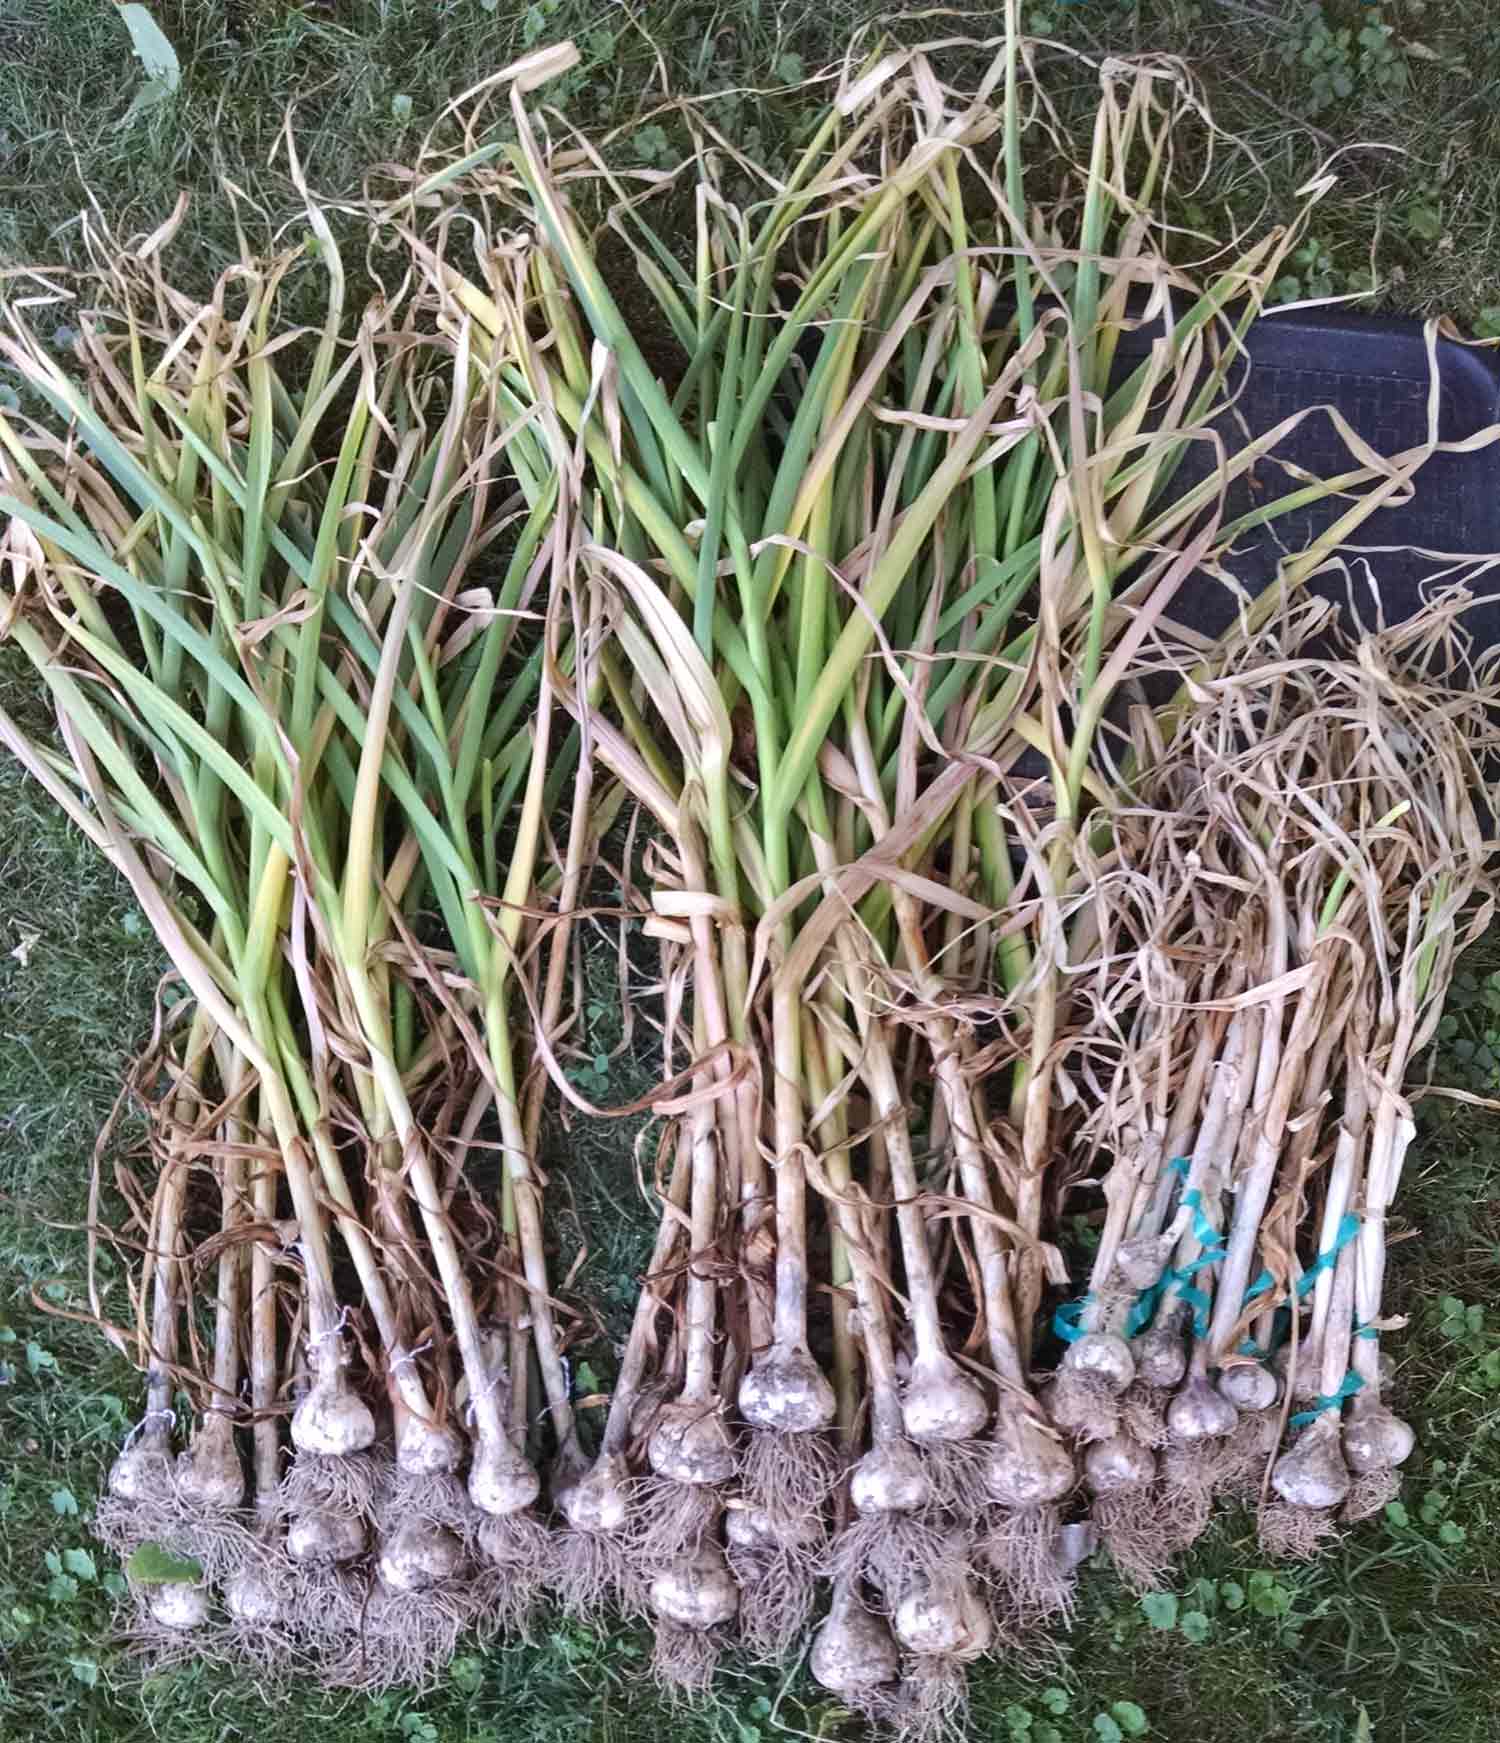
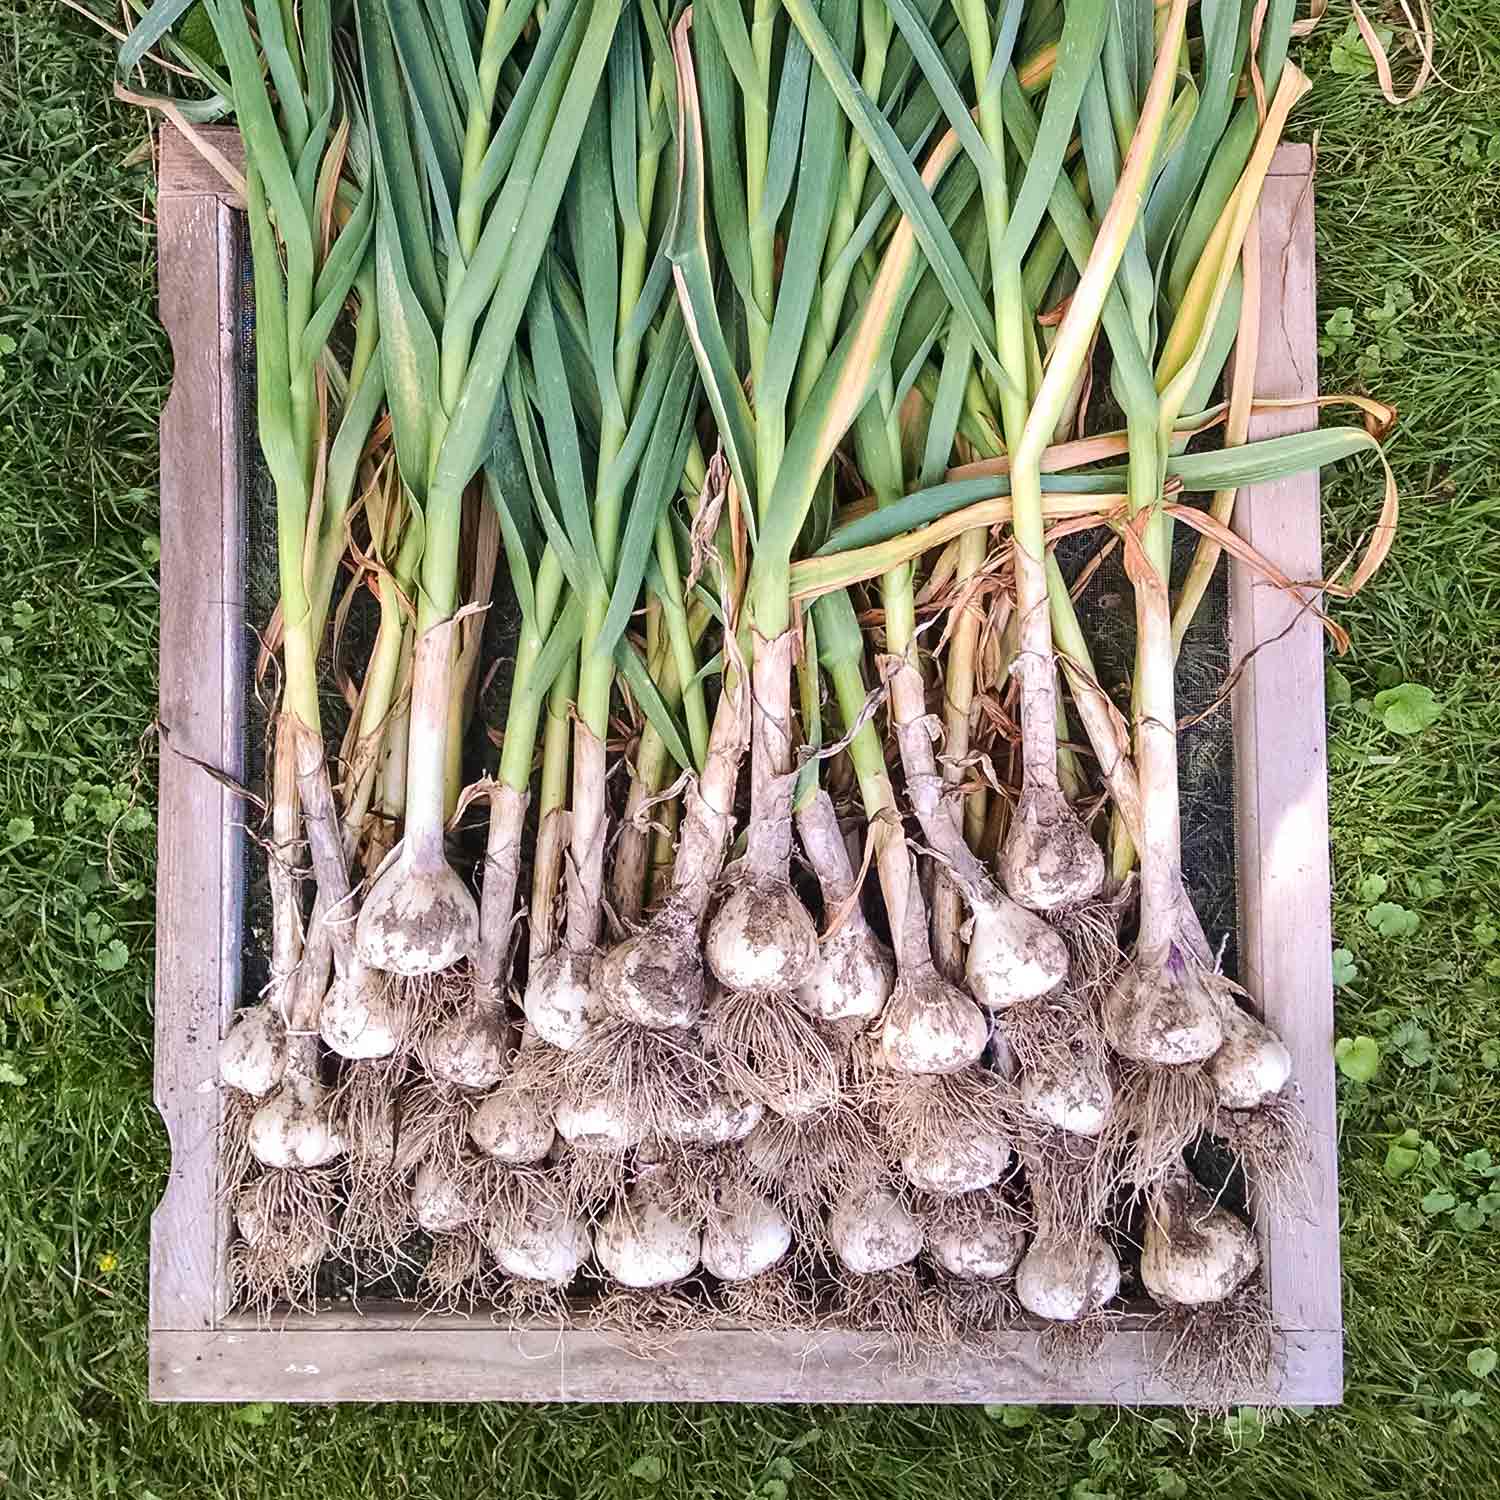
The photo above from my 2016 crop is a great example of harvest timing, and what the plants should look like. There are three varieties shown, separated by space (and tied with identifying strings, to be discussed later).
The left and center varieties were harvested at an optimal time. Notice the mix of brown, yellow, and green leaves, and that the long, round stems look fresh and sturdy. The variety on the right, however, I waited too long, and the plants were entirely brown and starting to dry out.
Now, the variety on the right is perfectly okay to eat and cook with, but it’s not optimal for long-term storage (and indeed, the bulbs didn’t last very long).
Depending on the climate in your area, as well as the variety, almost all garlics will be ready to harvest no later than the end of July. (Generally, the cooler your spring and summer, the longer it will take to reach maturity.)
Here in the Midwest, we have surprisingly hot Mays, which super-charges growth and usually results in a mid to late June harvest.
If it’s mid-July and your plants are taking their time browning at the tips, carefully loosen the soil to expose the top of the bulb and use your fingers to inspect and feel out the bulb. It should be full and firm, with distinct cloves.
If the bulb is small like a ping-pong ball, replace the soil and leave the plants be for another week or so, then check again.
Note that the plants in a single variety of garlic almost always mature at the same time. However, not all varieties mature at the same time. So, if you’re growing different types of garlic, it’s entirely possible that they’ll be harvested at different times.
Digging Up the Plants
It’s worth mentioning here at the outset that you should never just grasp and pull on a garlic plant. Even though a fully cured garlic bulb is quite sturdy, the plant itself and the growing bulb are most definitely not. Attempting to pull the plant before loosening below ground will likely break the stem at the bulb, and damage the bulb in the process.
The best way to dig up a garlic plant is to use a shovel to loosen the plant from underneath its root system. The method will depend on the planting pattern you used when you sowed your garlic cloves.
If you planted your garlic in rows, you can use a spade shovel as you walk down the rows. Sink the spade at a steep angle, targeting well below the plant, to get under its root system. If your soil is loose and loamy, you can apply gentle downward pressure on the shovel handle to partially pry up the plant, revealing the root system. Otherwise, you might have to repeat this dig/pry sequence in a circle around each plant to sufficiently free it from the soil.
Then grasp the plant just above the bulb and very gently pull. If the plant does not readily yield, stop, dig from another direction, and pry again.

It’s challenging to take a photo with one hand while shoveling with the other, but do note that the angle of the blade should be much steeper than shown above (which is poised to slice the bulb in half!).
I do not recommend using a gardening fork, because the tines are likely just far enough apart to catch the bulb between them and do some damage. Use a solid spade shovel.
If you planted your garlic in a checkerboard pattern, as I do to maximize space, using a hand shovel is the better bet. In a wide circle around the bulb, carefully begin digging and loosening the soil around and under the bulb. Then sink the shovel at an angle deep beneath the plant and pry gently upward, lifting the plant by its stem with your free hand.
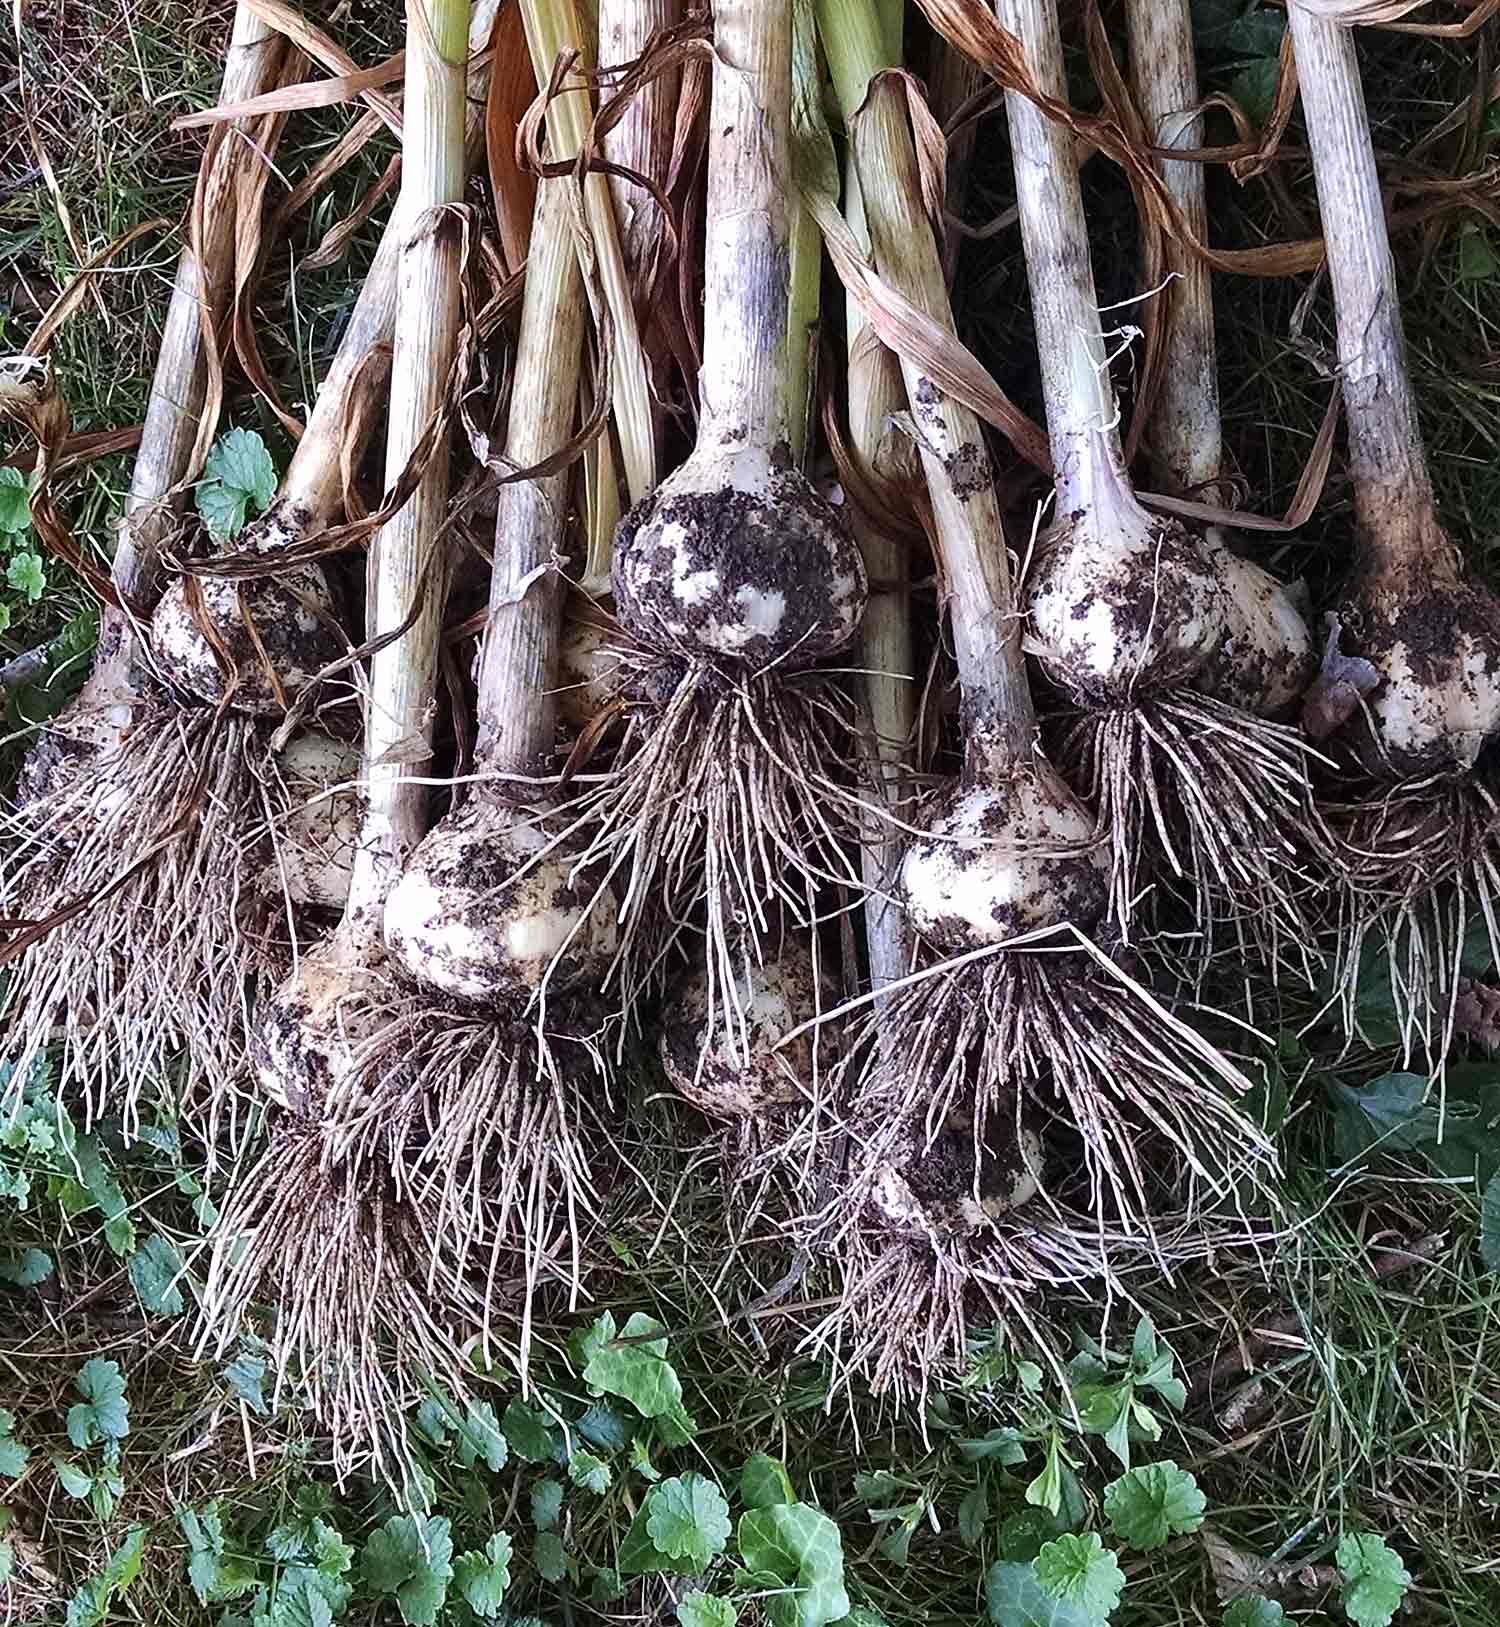
Note that the root system of a garlic bulb is quite impressive, so don’t be alarmed if it takes several tries of loosening from below to free the plant.
More About Growing Garlic
Label Your Plants
The next step in harvesting your garlic is curing, which involves the whole plant. But first, if you’re growing more than one variety, take a moment to separate your harvested garlic plants and label them in some fashion. Since I save and reseed my favorite varieties year after year — more than 15 years now! — I don’t want to take the chance of varieties losing their labels, because most look quite similar.
I use colored string, which I tie around the stem and close to the bulb in a double overhand knot. A double overhand knot stays securely tied but is also easy to remove by just tugging on one end. I precut the strings in 4″ lengths and bring them out to the garden with me, and add the strings as soon as the plants are harvested. I also make a note in my gardening journal about which variety got which color, because forgetting is a very me thing to do!
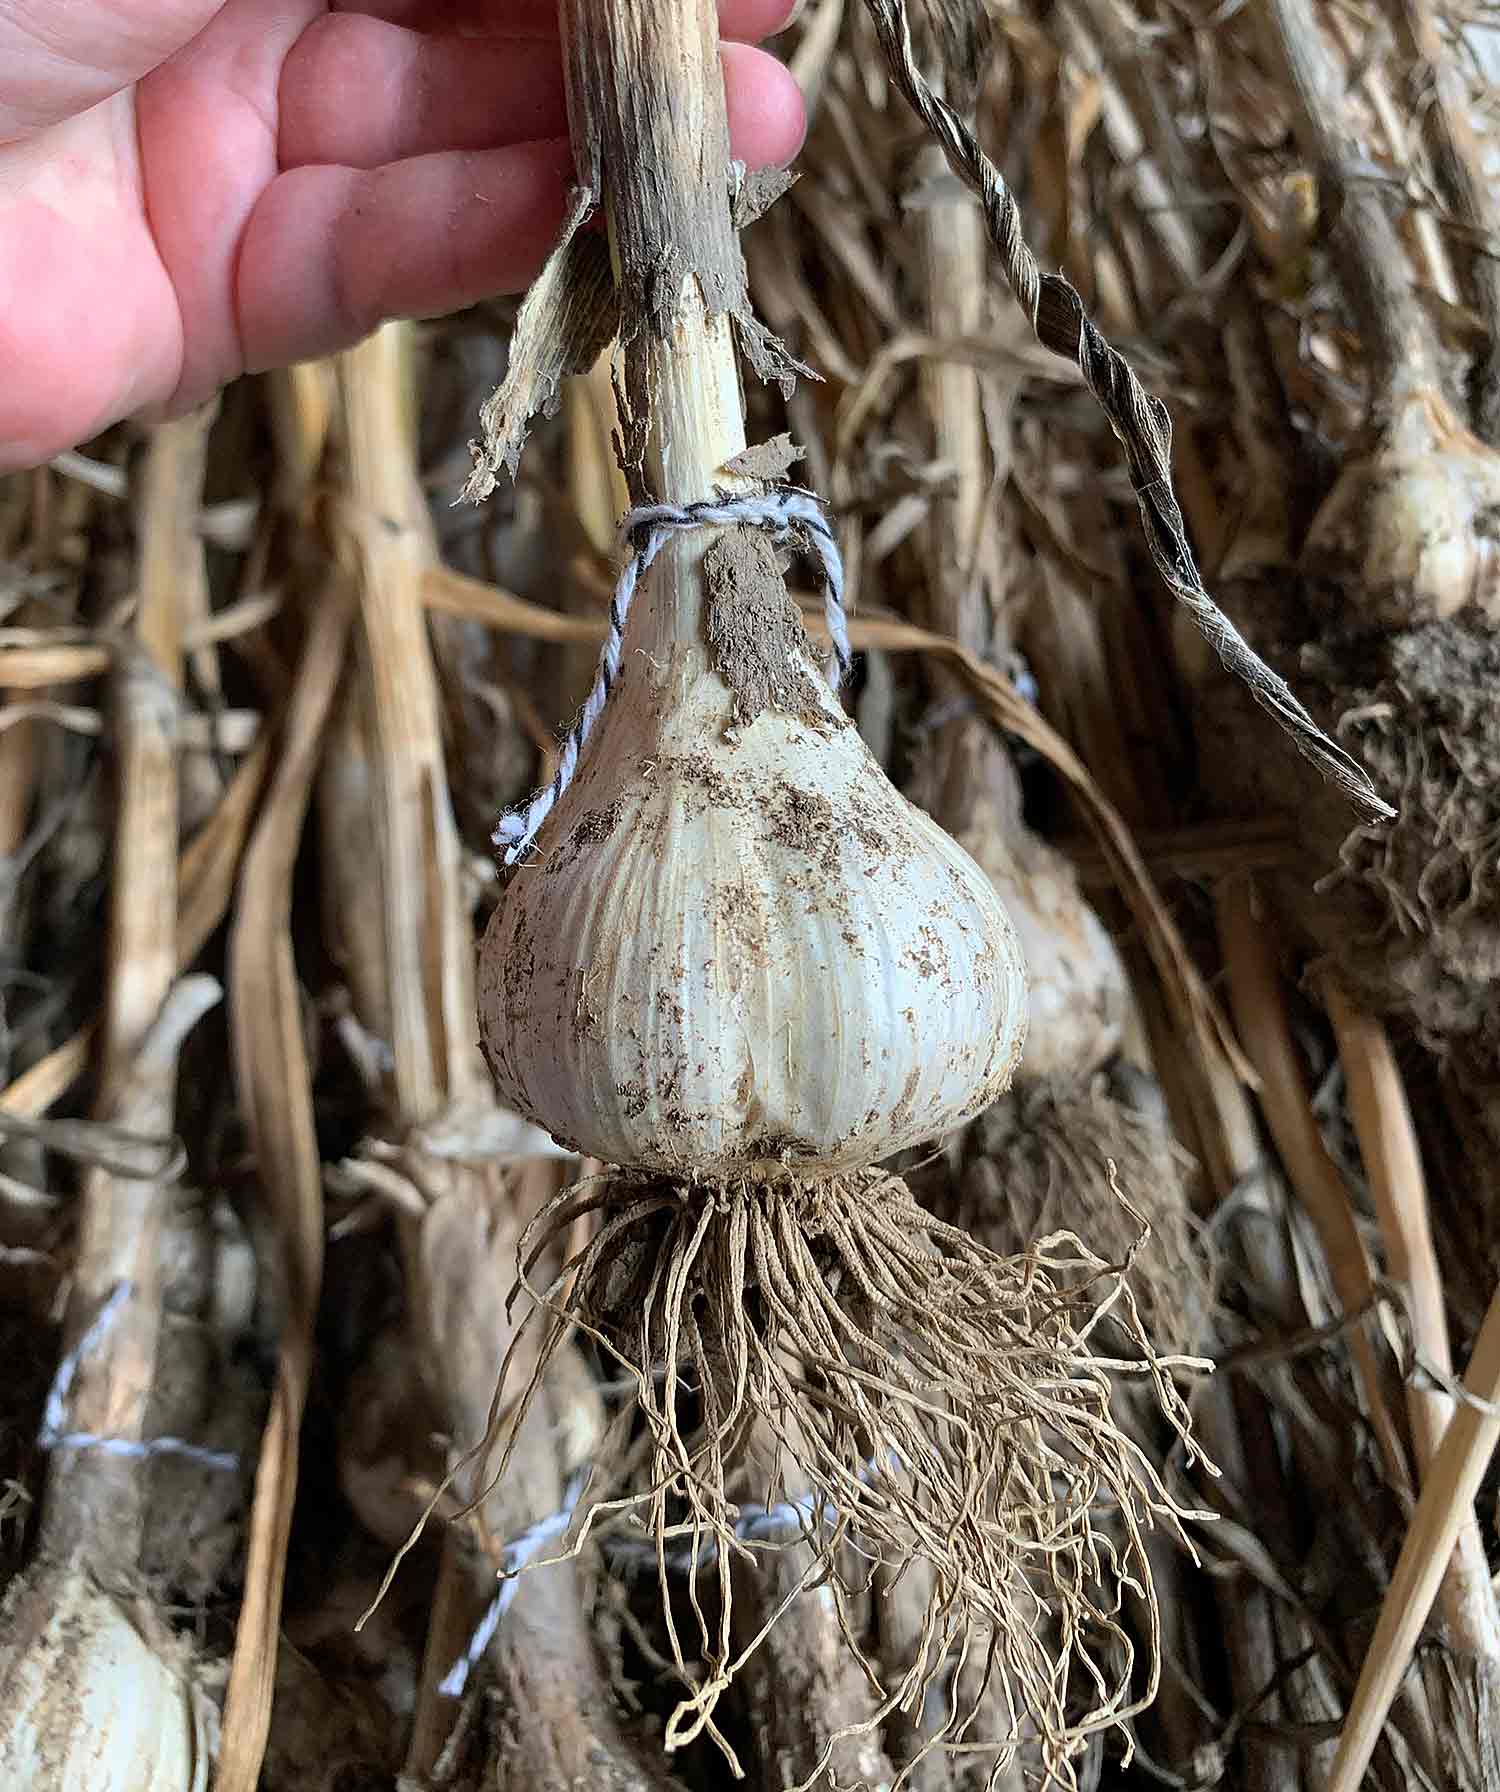
Later, after the bulbs are cured, trimmed, and cleaned, I take a permanent marker and write the variety’s initial on the tip of the stem. (Note that I grow only hardneck garlic because it’s my flavor preference. Softneck garlic will not have a hard stem.)

How to Cure Garlic
Prepping the Plants
Although it’s tempting, don’t trim or wash the garlic plants at this point. If the roots are caked with soil, you can gently tap off the excess clots. If any of the plants still have scapes attached, cut them off, but leave the rest of the plant intact.
Find an appropriate spot to cure your garlic and leave the plants to do their thing for two or three weeks.
Where is the best place to cure garlic?
Garlic needs airflow so that its outer skin dries properly while the inner bulb avoids rotting. Keep the garlic plants out of direct sun and out of the rain.
I cure my garlic outdoors in the shade. Because I live in a climate that gets short but frequent rain, I place all of my garlic on a large framed screen, and move the screen in and out of my garage each day when rain is threatened.

Garlic farmers often bundle their garlic plants loosely and hang them from the rafters in an open shed, which is an ideal setting. If you choose to do the same, make sure there’s enough airflow so that the garlic is not exposed to 100°+ temps.
I have a friend who hangs his garlic from tree branches on a full, bushy tree that’s well-protected from the rain.
Other ideas: if you have a covered porch or deck in total shade, hang them from the ceiling.
Can you cure garlic indoors?
Technically, yes, but it’s a stinky process, so “indoors” should be a garage or shed where live beings do not spend much time. If the location is not air-conditioned, make sure there is sufficient airflow through the room.
The timing of harvest means that garlic will be curing during the high heat of summer weather. A stifling, humid environment is not optimal for healthy curing.
How long does it take?
The timing depends largely on the weather. If the weather is dry with moderate heat, it can take as little as two weeks. If it’s hot and humid, it will take longer for the skins to properly and thoroughly set and dry.
How do you tell when garlic is finished curing?
One of the easiest ways to tell if hardneck garlic has finished curing is to cut the stem about 4″ above the bulb and examine the interior of the stem. It should be solid white with no green growth or cracks present.

For long-term storage purposes, however, you’ll also want to ensure that the protective papery wrapping around the bulb is stiff and unbroken. You’ll likely need to clean up the bulb a little bit before inspecting it by carefully brushing off dried soil and pulling off any browned and limp materials from the bulb.
A cured, well-protected, and cleaned bulb’s outer wrapper will actually appear quite bright, either white or white with purple streaks, depending on the variety. The bulb should be firm and solid.
Clean the garlic
When the bulbs have finished curing, it’s time to prep them for long-term storage.
- Snip off the roots as close to the bulb as possible.
- Cut off the plant stem, leaving about 3″ above the bulb.
- Outer layers of the stem and bulb may be quite loose at this point: gently pull them off, so that only clean, firmly affixed wrappings remain.
Sort Your Garlic
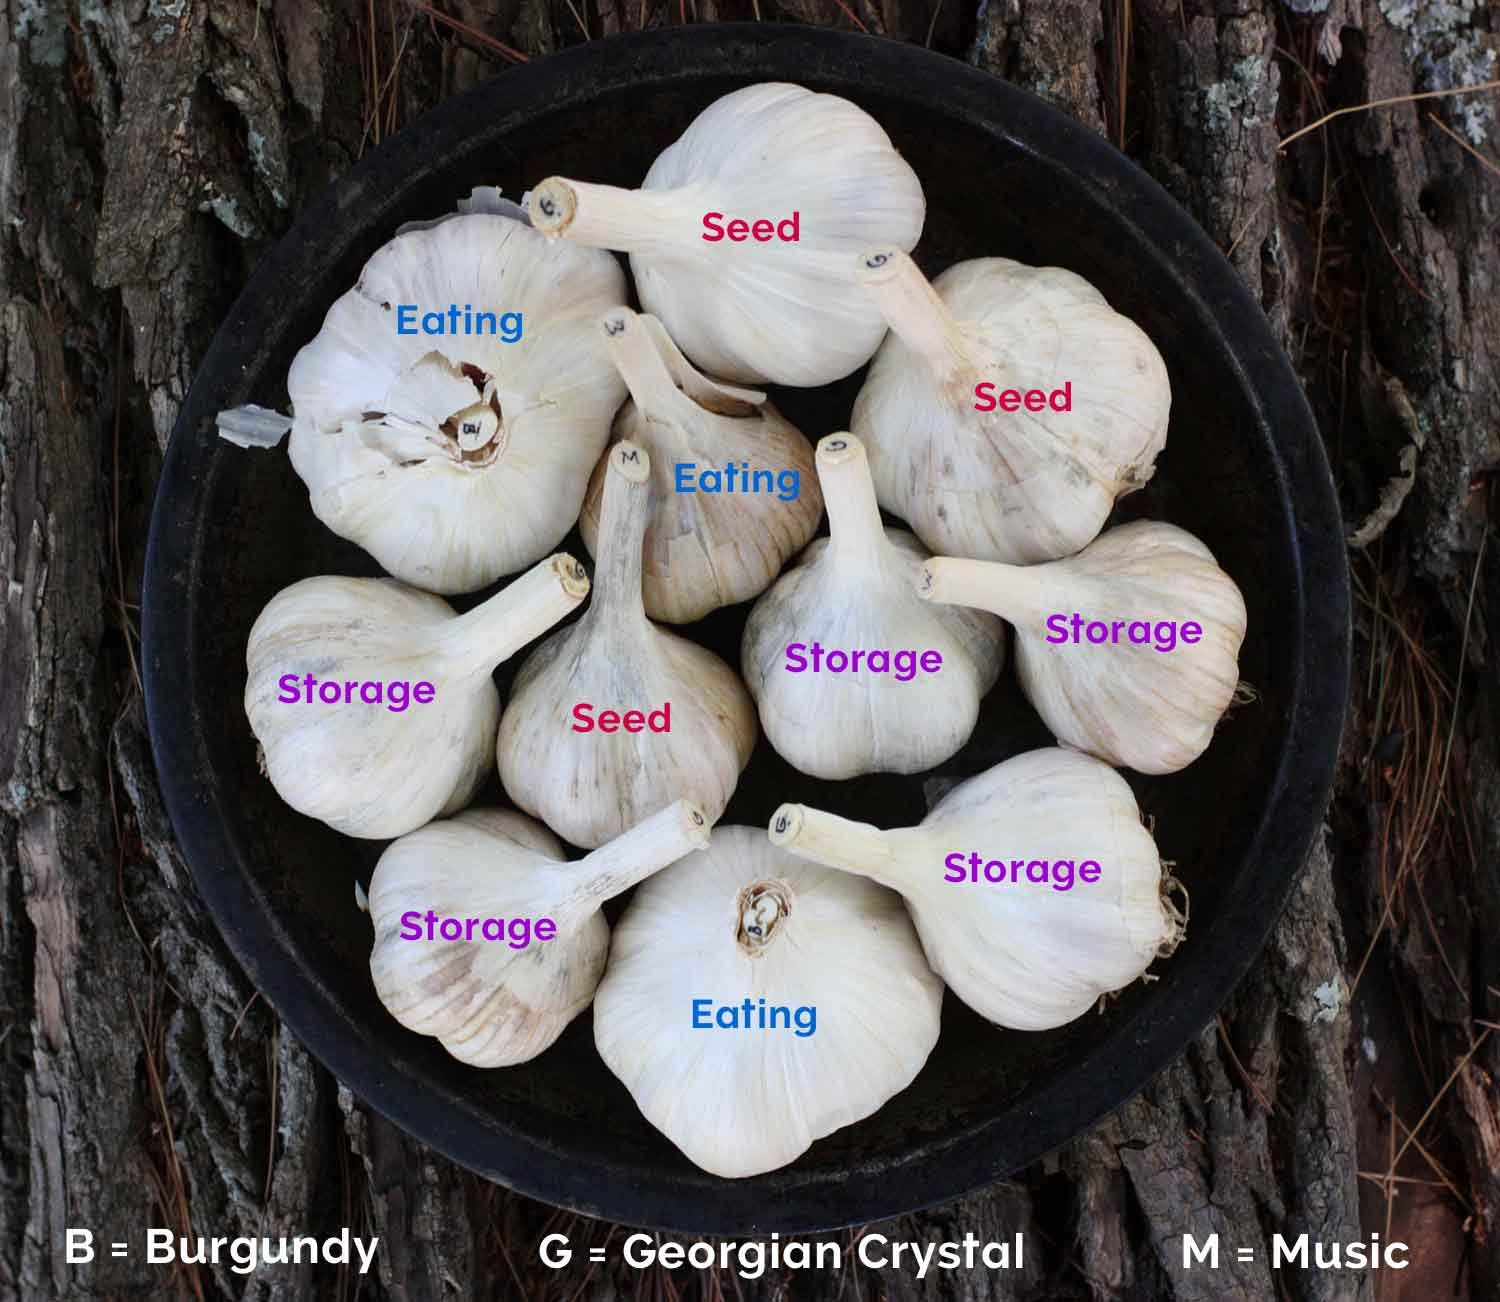
Despite our best efforts, each garlic plant will produce a bulb in its own unique state of perfection. Or lack thereof. If you’re planning on storing and/or using some of your garlic cloves to seed next year, it will benefit you to inspect and rank each bulb for its best purpose.
Garlic that’s meant to be stored for later use should be in pristine condition. There should be no breaches in the protective wrapping — no cloves should be exposed — and the stem tip of hardnecks should be solid and undamaged. This will allow garlic to last well into winter.
Bulbs for seed garlic should be similarly pristine. You also should choose the bulbs with the largest cloves. Large cloves have the best odds for producing large bulbs.
Although not slated for longer-term storage, the bulbs still need to sit in very healthy shape for four to five months, until fall’s planting.
The remaining bulbs should be prioritized for eating and cooking or preserving. I personally shy away from any bulbs where the tender cloves are exposed, as all manner of things could’ve crept down into them at any point.
I grow enough that I’m comfortable letting some bulbs go. Honestly, this rarely happens, where a bulb is so damaged as to be unusable, but when it does, I don’t hesitate.
Here is a photo from my 2015 harvest, with a selection of cured (and labeled!) garlic bulbs. I’ve annotated the photo to indicate how I would classify these bulbs, so that you have a visual example of my judging process. (Note the labeling on the stems!)
How long does cured garlic last?
Properly cured garlic can last quite a long time, depending on the process, the health of the bulbs at harvest, the storage environment, and the variety of garlic. I’ve had garlic last all the through to March. Here are the key factors for successfully storing garlic over the winter:
- Healthy bulbs: A healthy bulb is first and foremost fully encased in an unbroken skin wrapper from the roots up through the neck. Cloves on the outer ring should be full and plump and solid (no mushy spots). The stem should be sturdy, or solid and rigid in the case of a hardneck variety.
- Curing process: Proper curing is essential to the longevity of a garlic bulb.
- Storage environment: Garlic bulbs will last their longest, no matter the variety, if stored in a cool, dark, dry environment: 50-55°F and low humidity. Options include a cool, dry basement or pantry, or a shadowed corner of the kitchen away from appliances. Store the bulbs loosely in an airy basket or mesh bag, as they need airflow to keep from rotting. Do not store in a closed container, such as a plastic bag or tub.
- Garlic variety: In general, softneck garlic varieties store longer than hardneck varieties, sometimes by a month or more. So, if your primary goal is to have fresh garlic from one crop to the next, choose at least one softneck variety. I do have to say, though, that I grow hardneck varieties almost exclusively because of their amazing flavors. Paying careful attention to curing and storage lets my garlic last for 5 to 7 months.
I also make it a point to encourage new and fellow gardeners to try growing garlic. It’s an easy crop with a high-reward factor, and with just a little bit of extra care at harvest, you’ll have fresh garlic well into the winter cooking season!


 Welcome! I'm Karen, Chief Gardener, Tool Cleaner, Tomato Pruner, and Cabbage Worm Picker-Offer.
my only question would be: do I HAVE to cut the stems? I’ve seen people braid and hang them? what’s the your thoughts on this technique?
Braiding can only be done with soft neck garlic, which I don’t grow, so if braiding is your goal, make sure to choose a soft neck variety.
Hi there! It was my first year growing garlic and I wish I had read this article before cutting the stalks off my cured garlic….I cut them shorter than the 3 inches you recommend….what can I expect as a result? Will it spoil faster? Anything I can do to prolong the shelf life at this point? Also some of the larger ones aren’t completely finished curing (the bulbs are hard but the stem isn’t 100% fully dried like it is with the smaller ones). I was going to use those first because I’d imagine they’d spoil quicker than the others?
I’m so confused I end up cutting my garlic stocks off because I thought those were escapes so what’s the difference between the stocks and the escapes? I don’t understand.